If you’re the Account Owner of your nonprofit on findCRA, you can complete the Service Area section of your nonprofit’s Community Qualifier profile in the seven-step walk-through immediately after you claim your nonprofit or at a later time, directly from your nonprofit’s profile. In this article, we’ll cover how to access the ability to edit your nonprofits Service Area and how to use the Service Area selector tool.
Note: Your nonprofit’s Service Area information will appear in the “Geographies Served” field of your nonprofit profile under the “Location” section.
Where to Edit the Service Area Field
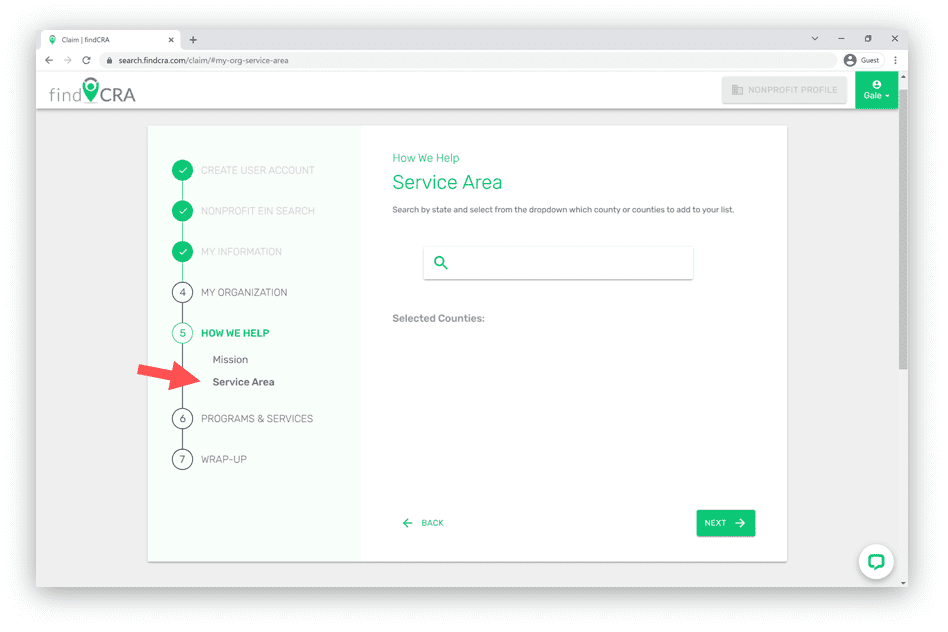
Option 1: Step 5 after claiming your nonprofit
When a nonprofit is claimed for the first time, the user that claims the organization automatically becomes its Account Owner is prompted to complete a seven-step walk-through where they have the option to complete various fields on their nonprofit’s Community Qualifier profile. The Service Area section of your nonprofit’s profile can be completed from step five of this walk-through. Learn more about how to claim your nonprofit profile.
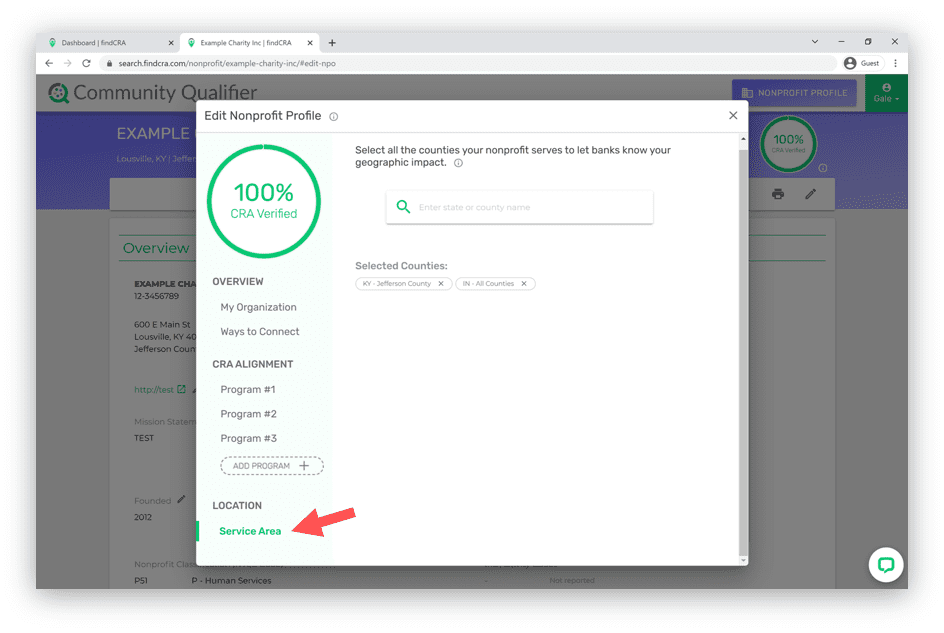
Option 2: Directly from your nonprofit profile
Once you’ve claimed your nonprofit and have exited the seven-step walk-through for completing its profile, you can edit your nonprofit’s info anytime directly from its profile by clicking the Edit ![]() button and opening the Service Area section in the editing window.
button and opening the Service Area section in the editing window.
How to Use the Service Area Selector
The Service Area selector tool allows you to search by state or county and select the county or counties where you’re organization is providing services to the community.
Note: This tool works the same regardless of whether you access it on Step 5 of the claim flow or from the profile editing window.
Step 1. Click inside the geography search box
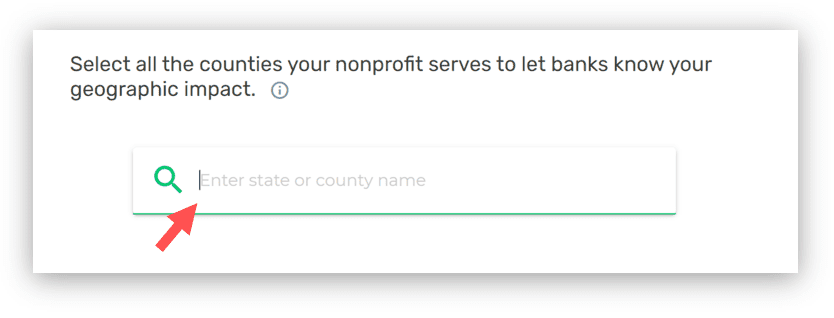
Step 2. Type the name of the state/county you want to add and then select it from the dropdown list of options

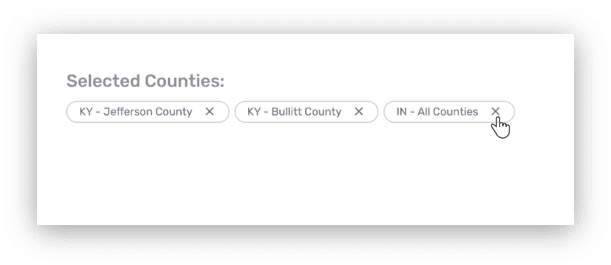
Note: You’ll need to repeat this step for each individual county you want to add to your Service Area, or if your nonprofit is serving every county in a particular state, you can select the “All Counties” option for that state which will always be at the top of the dropdown list of options.
Step 3. View or remove selected counties
You can easily see the counties or states you’ve added to your Service Area in the “Selected Counties” section. These are the counties that will appear on your Community Qualifier profile under the Geographies Served section. To remove a county or state, click the Remove ![]() button inside the oval shape that contains the county or state you want to remove.
button inside the oval shape that contains the county or state you want to remove.
Step 4. Contact us if you need help
We know that every organization is unique and defining your Service Area at the county or state level may not be practical for the way your nonprofit operates. If you need assistance with completing the Service Area field, contact us at support@findCRA.com or start a LiveChat online, and one of our team members will help set up your Service Area in a way that makes the most sense for your organization.